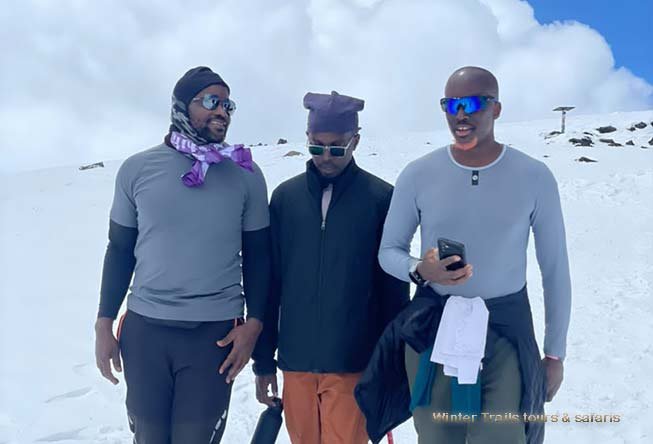
Package Overview
Overview of the 9-Day Lemosho Route
The 9-Day Lemosho Route is the premium itinerary on Mount Kilimanjaro — the most scenic, the most gradual, and by far the best for acclimatization. While the 7 and 8-day versions are excellent, the 9-day version takes the same stunning western approach and stretches it over an extra day, adding a crucial acclimatization stop at Moir Hut (4,200m) before descending to Barranco. This extra day on the mountain pushes summit success rates to 92% and above, making it the single best route on Kilimanjaro for first-time high-altitude trekkers, families, and anyone who wants the highest possible chance of standing on Uhuru Peak (5,895m) .
The route begins at the remote Londorossi Gate (2,100m) on the western side of the mountain, where crowds are minimal and the rainforest is at its most pristine. Over the first two days, you climb gently through montane rainforest — home to colobus monkeys, blue monkeys, and turaco birds — before emerging onto the sweeping Shira Plateau. Unlike shorter itineraries, the 9-day version spends three full days on the plateau and its surrounding ridges, walking relatively gentle terrain while your body adapts to the altitude.
On Day 4, instead of descending directly to Barranco, the 9-day route turns north toward Moir Hut (4,200m) — a quiet, less-travelled camp below the Lent Hills. This extra night at altitude, followed by a traverse across the Southern Circuit on Day 5, is the key to the 9-day route's superior acclimatization profile. From there, you join the Machame trail through Barranco, Karanga, and Barafu before the midnight summit push to Stella Point (5,735m) and Uhuru Peak (5,895m) .
This 9-Day Lemosho Route with Winter Trails Tours and Safaris is the recommended itinerary for anyone who wants the best possible experience on Kilimanjaro — the finest scenery, the highest success rate, and the most comfortable pacing. The extra day makes a measurable difference, not just to your odds of reaching the summit, but to your overall enjoyment of the trek.

Itinerary
Day 1 — Arrival in Moshi or Arusha
Elevation: 915m
Habitat: Cultivated zone
Welcome to Tanzania. On arrival at Kilimanjaro International Airport (JRO) , you'll be met by your Winter Trails Tours and Safaris representative and transferred to your hotel in Moshi or Arusha. In the evening, you'll meet your mountain guide for a detailed briefing and equipment check.
| Item | Details |
|---|---|
| Location | Moshi or Arusha |
| Altitude | 915m |
| Activity | Arrival, briefing, gear check |
| Accommodation | Hotel |
| Meals | Bed & Breakfast |
| Prep Required | Confirm gear, medical check, sign waivers |
Day 2 — Londorossi Gate to Mti Mkubwa Camp
Elevation: 2,100m → 2,820m
Hiking Time: 3–4 hours
Distance: ~7 km
Habitat: Montane rainforest
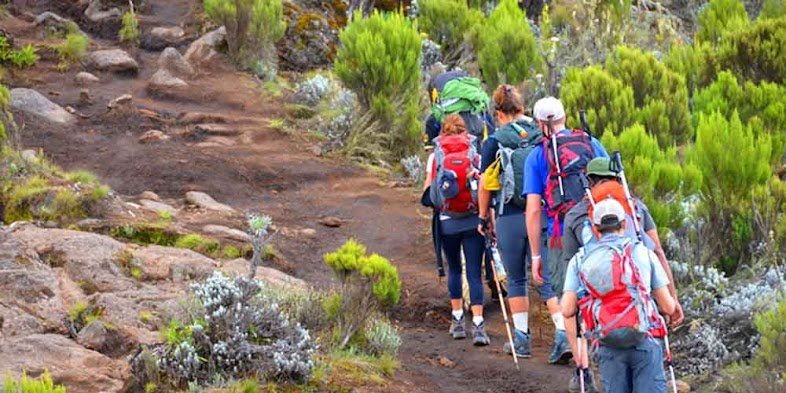
After breakfast, you'll drive from Moshi to Londorossi Gate — the western entrance to Kilimanjaro National Park. After registration, you'll begin your ascent through lush montane rainforest. Listen for colobus monkeys and watch for turacos and hornbills.
Day Analysis Table:
| Metric | Details |
|---|---|
| Elevation Gain | +720m |
| Hiking Time | 3–4 hours |
| Distance | 7 km |
| Difficulty | Easy |
| Habitat Zone | Rainforest (2,100–2,820m) |
| Key Wildlife | Colobus monkeys, turacos, hornbills |
| Terrain | Muddy trail, shaded canopy |
| Water Source | Available at camp |
| Sleeping Altitude | 2,820m |
| Acclimatization Purpose | Gentle start, body adjustment |
Accommodation: Mti Mkubwa Camp | Meals: Breakfast, Lunch, Dinner
Day 3 — Mti Mkubwa Camp to Shira 1 Camp
Elevation: 2,820m → 3,505m
Hiking Time: 5–6 hours
Distance: ~8 km
Habitat: Moorland and heath
After breakfast, you'll leave the rainforest behind and enter the heath and moorland zone. The trail climbs steeply out of the forest, and the vegetation changes dramatically — tall forest gives way to giant heather, then open moorland.
Day Analysis Table:
| Metric | Details |
|---|---|
| Elevation Gain | +685m |
| Hiking Time | 5–6 hours |
| Distance | 8 km |
| Difficulty | Moderate |
| Habitat Zone | Heath & Moorland (2,820–3,505m) |
| Key Feature | First views of Kibo summit |
| Terrain | Steep forest exit, open moorland |
| Water Source | Streams available |
| Sleeping Altitude | 3,505m |
| Acclimatization Purpose | First high-altitude night |
Accommodation: Shira 1 Camp | Meals: Breakfast, Lunch, Dinner
Day 4 — Shira 1 Camp to Shira 2 Camp
Elevation: 3,505m → 3,850m
Hiking Time: 4–5 hours
Distance: ~7 km
Habitat: Moorland
Today is a relatively gentle hiking day across the beautiful Shira Plateau. The trail crosses open moorland with views of Mount Meru and the surrounding valleys. The gradual ascent helps your body adjust to the increasing altitude.
Day Analysis Table:
| Metric | Details |
|---|---|
| Elevation Gain | +345m |
| Hiking Time | 4–5 hours |
| Distance | 7 km |
| Difficulty | Easy |
| Habitat Zone | Moorland (3,505–3,850m) |
| Key Feature | Views of Mount Meru & Kibo |
| Terrain | Gentle plateau, rocky outcrops |
| Water Source | Stream near camp |
| Sleeping Altitude | 3,850m |
| Acclimatization Purpose | Second plateau day |
Accommodation: Shira 2 Camp | Meals: Breakfast, Lunch, Dinner
Day 5 — Shira 2 Camp to Moir Hut
Elevation: 3,850m → 4,200m
Hiking Time: 5–6 hours
Distance: ~8 km
Habitat: Alpine desert
Today the route turns north toward Moir Hut (4,200m) — a quiet, less-travelled section of the mountain. This is the key addition that distinguishes the 9-day Lemosho Route from the shorter versions.
Day Analysis Table:
| Metric | Details |
|---|---|
| Elevation Gain | +350m |
| Hiking Time | 5–6 hours |
| Distance | 8 km |
| Difficulty | Moderate |
| Habitat Zone | Alpine Desert (3,850–4,200m) |
| Key Feature | Remote camp below Lent Hills |
| Terrain | Rocky, open, exposed |
| Water Source | Limited — carry from Shira 2 |
| Sleeping Altitude | 4,200m |
| Acclimatization Purpose | ✅ Critical altitude night |
| Optional Hike | Lent Hills (4,500m+) |
Accommodation: Moir Hut | Meals: Breakfast, Lunch, Dinner
Day 6 — Moir Hut to Barranco Camp via Lava Tower
Elevation: 4,200m → 4,640m (Lava Tower) → 3,960m (Barranco)
Hiking Time: 6–7 hours
Distance: ~10 km
Habitat: Alpine desert
Today is a crucial acclimatization day. You'll descend from Moir Hut and connect with the main Machame Route, climbing steadily to Lava Tower (4,640m) before descending into the Great Barranco Valley.
Day 7 — Barranco Camp to Karanga Camp
Elevation: 3,960m → 4,035m
Hiking Time: 4–5 hours
Distance: ~5 km
Habitat: Alpine desert
After breakfast, you'll set off on one of the most exciting sections of the trek — the Barranco Wall. This steep, non-technical scramble takes about 1.5 hours to climb, and the views from the top are spectacular.
Day 8 — Karanga Camp to Barafu Camp
Elevation: 4,035m → 4,640m
Hiking Time: 3–4 hours
Distance: ~4 km
Habitat: Alpine desert
After breakfast, you'll ascend steadily through rocky terrain to reach Barafu Camp (4,640m) , the final base before summit night. You'll arrive in time for an early dinner and briefing.
Day Analysis Table:
| Metric | Details |
|---|---|
| Elevation Gain | +605m |
| Hiking Time | 3–4 hours |
| Distance | 4 km |
| Difficulty | Moderate |
| Habitat Zone | Alpine Desert |
| Key Feature | Final camp before summit |
| Terrain | Steep scree, rocky |
| Water Source | At camp (last reliable water) |
| Sleeping Altitude | 4,640m |
| Summit Prep | Early dinner, sleep by 7 PM |
| Wake Up Time | ~11:00 PM |
Accommodation: Barafu Camp | Meals: Breakfast, Lunch, Dinner
Day 9 — Barafu Camp to Uhuru Peak to Mweka Camp
Elevation: 4,640m → 5,895m → 3,100m
Hiking Time: 10–14 hours
Distance: ~17 km
Habitat: Arctic summit and alpine desert
This is the most demanding day of the trek. You'll begin the ascent around midnight, reaching Stella Point (5,735m) at sunrise, and then Uhuru Peak (5,895m) — the highest point in Africa — shortly after.
Summit Day Timeline Table:
| Time | Activity | Location | Altitude |
|---|---|---|---|
| 11:00 PM (Day 8) | Wake up, tea & biscuits | Barafu Camp | 4,640m |
| 12:00 AM | Begin summit ascent | Barafu Camp | 4,640m |
| 2:00 AM | First rest stop | Scree slopes | ~5,000m |
| 4:00 AM | Second rest stop | Near crater rim | ~5,400m |
| 5:30 AM | Reach Stella Point | Crater rim | 5,735m |
| 6:30 AM | Sunrise over crater | Crater rim | 5,735m |
| 7:00 AM | Reach Uhuru Peak | Summit | 5,895m |
| 7:30 AM | Begin descent | Uhuru Peak | 5,895m |
| 9:00 AM | Return to Stella Point | Crater rim | 5,735m |
| 11:00 AM | Return to Barafu | Barafu Camp | 4,640m |
| 12:00 PM | Lunch | Barafu Camp | 4,640m |
| 1:00 PM | Continue descent | Mweka trail | 4,000m |
| 4:00 PM | Arrive at Mweka Camp | Mweka Camp | 3,100m |
| 6:00 PM | Dinner & rest | Mweka Camp | 3,100m |
Day Analysis Table:
| Metric | Details |
|---|---|
| Elevation Gain | +1,255m (to summit) |
| Elevation Loss | -2,795m (to Mweka) |
| Hiking Time | 10–14 hours |
| Distance | 17 km |
| Difficulty | Challenging |
| Habitat Zones | Arctic + Alpine Desert |
| Key Feature | Uhuru Peak (5,895m) |
| Terrain | Scree, snow, crater rim |
| Water Source | None — carry all water |
| Sleeping Altitude | 3,100m (Mweka Camp) |
| Summit Certificate | Yes (Stella Point + Uhuru) |
Accommodation: Mweka Camp | Meals: Breakfast, Lunch, Dinner
Included services in itinerary
- Meals (Breakfast, Lunch and Dinner) Included in itinerary
- Accommodation services
- Photography Opportunities
- Camping Experience
- Entrance Fees Included
- Hiking / Trekking
- Itinerary Planning
- Professional English-speaking safari guides
- Full Communication Equipment in Safari Vehicles
Excluded
- Swimming / Beach Access
- Tips and Gratuities not included
Trip Information
PDF format with full itinerary
Request this tour
More Related Packages

6 Days Marangu Route Kilimanjaro Hiking
6 Days Umbwe Route — Kilimanjaro
6 Days Kilimanjaro Climbing via Rongai Route
7 Days Lemosho Route Kilimanjaro Trek